

Ever eat peaches and cream in a bowl with a spoon? That's what these cupcakes taste like...Delish! It's a moist cupcake because of the peach juice and even better eating after a day goes by.  The recipe is from Julie Hasson's 125 Cupcakes book, but I substituted the nectarines she calls for because I couldn't find any really ripe ones. But, the peaches I found at Whole Foods were ripe and sweet, so I came home very happy to begin baking my cupcakes. Her recipe calls for lemon zest, but I used orange zest instead.
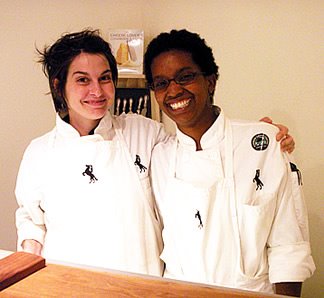 But first I must digress to tell you about the place where I bought the mascarpone that I used to make the frosting. It's smply the coolest new business in Washington,D.C...it's called Cowgirl Creamery, which I read about in the Washington Post, and we went to vist. We had the best time there and stayed for quite a while testing out many different types of cheese. They have the cutest aprons. We tried to buy one, but they aren't for sale. We met the nicest people including Erica, shown in this photo on the right! Pop in sometime and tell Erica hi! Here's the address: 919 F St. NW, Washington, DC...it's right near the Spy Museum.
 Just before our cheese vist, we hit U Street in search of Cakelove...well, really we were looking for Warren Brown, but we didn't find him, although we heard he had a great party the night before! We were able to find and wrap our lips around these cupcakes: vanilla, chocolate, strawberry, and german chocolate. By far the best was the german chocolate. Suprisingly, the cupcakes themselves weren't that great, but the frostings were all awesome!
 Here's the recipe for the cupcakes...Layla especially lked the mascarpone (Martha Stewart's recipe below).
Peach Cupcakes with Martha Stewart's Mascarpone Frosting
Makes 12 cupcakes
Preheat oven to 350 degrees F (180 degrees C)
1-1/2 cups (375 mL) all purpose flour
1 tsp (5 mL) baking powder
1/2 tsp (2 mL) ground nutmeg
1/4 tsp (1 mL) salt
1-1/4 cups (300 mL) granulated sugar
1/2 cup (125 mL) unsalted butter, at room temperature
3 eggs
1 tsp (5 mL) vanilla
2 tsp (10 mL) grated orange zest
3/4 cup (175 mL) milk
2 peaches or nectarines, pitted and thinly sliced and cut into thirds
1. In a small bowl, mix together flour, baking powder, nutmeg and salt.
2. In a large bowl, using an electric mixer, beat together sugar and butter until well combined. Add eggs, one at a time, beating well after each addition until light and fluffly. Add vanilla and orange zest, beating well. Alternately beat in flour mixture and milk, making three additions of flour mixture and two of milk, beating until smooth. Fold in peaches or nectarines.
3. Scoop batter into prepared pan. Bake in preheated over for 23-28 minutes or until golden brown and tops of cupcakes spring back when lightly touched.
Let cool in pan on rack for 10 minutes. Remove from pan and let cool completely on rack.
Martha Stewart's Mascarpone Frosting
1 pound mascarpone cheese (always buy from Cowgirl Creamery)
1/2 cup confectioners sugar
1-1/4 cups heavy cream
In the bowl of an electric mixer fitted with the paddle attachment (I didn't have this and just used the regular beaters), beat themascarpone, cream and confectioners' sugar until medium-soft peaks form, 1 to 2 minutes. Be careful no to overbeat. Use immediately.
My note: I started out beating at medium speed...bad news...then I poured on the speed to almost the highest my mixer would go. Success! It has to be beaten high speed to get thicker. I also think it was the awesome mascarpone I bought from Cowgirl Creamery!
Rock On!![]()
Everything's Just Peachy...If You've Got Peach Cupcakes with Martha Stewart's Mascarpone Frosting
In the Limelight: Coconut Lime Cupcakes
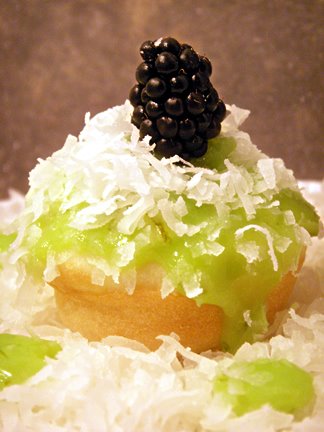
You won't believe how delicious these cupcakes are...You'll just have to make them yourselves to find out...but I assure you, you won't be disappointed. I got this recipe for Coconut Cupcakes with Lime Curd from the book by Marcianne Miller called The Artful Cupcake. They are actually coconut cupcakes with lime curd on top, topped with more coconut. As with most of my other cupcake experiences, this one began with a trip to the grocery store...Food Lion in this case. I hadn't been there for a while but Saturday morning I read an article in the Washington Post about how Food Lion is splitting into three different kinds of stores: Bloom, Bottom Dollar and, well, Food Lion. The Rockville Food Lion is in the deconstructing phase. I was talking with the manager about the article in the paper and he said that this Food Lion will soon become a "Bloom" version. I was so happy to hear that. I've been a Food Lion phan since I started baking my cupcakes. I can't wait to see what it will be like! Does anyone have one yet?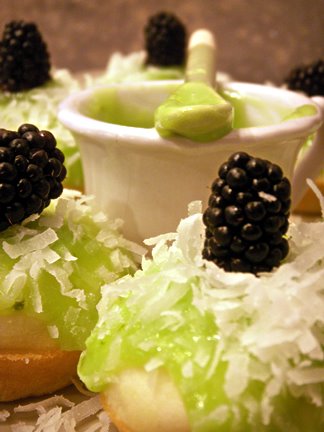 I made the cupcakes on Saturday night, knowing that I was making a trip to IKEA on Sunday morning all the way to Woodbridge, Virginia, to pick up a chair I wanted that wasn't available anywhere else in our area. I didn't get to complete them until last night. I always like to at least get a head start if I have some other stuff to do because usually something else steps into that time space and...well...you know what I mean...The cupcakes themselves are so subtle...at first I thought they were a bit bland...just a hint of coconut and then you get the flavor of the coconut milk. This was the first time that I have made cupcakes without liners. It worked really well because I was mindful to spray the cupcake tins before I plopped in the batter.
 The fun really began, however, with making the lime curd. I was nervous about this part because I've never made lime curd before. I was afraid it wouldn't turn out and I was kind of tired from my trip to Woodbridge. But, it all turned out just fine! First, you have to juice three limes. You'll need to have powdered gelatin on hand, too. And, green food coloring...it goes pretty fast once you get the first step done...the actual on the stove part, I mean. I just have to say this: OMG! I've never tasted lime curd before and it is to die for...by the end, we were just eating the leftovers out of the bowl! The I realized why the cupcakes were so subtle...it's not until the two flavors are mixed...well three, really...cupcake, coconut and lime...that you really get the full effect. I did have some of the lime curd left over and we used it as an accessory to our eating of the cupcakes...a little lime curd dipping sauce was just the right addition.
Here's the recipe:
COCONUT CUPCAKES
(Based on Marcianne Miller's recipe from her book The Artful Cupcake with some slight changes)
Note: The coconut milk used in this recipe is unsweetened and can be found with Thai foods in grocery stores. The coconut milk that you find with drink mixes has been sweetened.
3/4 cup shredded coconut
1-1/4 cups unsweetened coconut milk
1 egg
3 egg whites
2-3/4 cups cake flour
1/2 teaspoon salt
1 tablespoon baking powder
8 oz (2 sticks) unsalted butter, room temperature
1/2 cups sugar
1. Preheat the oven to 350 degrees. Prepare the cupcake pans with nonstick spray. If you want the cupcakes to have smooth sides, don't use baking cups.
2. Soak the coconut in 1/4 cup of the coconut milk. Set aside.
3. Combine the remaining cup of coconut milk with the egg and egg whites.
4. Sift together the flour, baking powder, and salt.
5. Cream the butter and sugar together until pale and fluffy. Add the soaked coconut.
6. Add the egg mixture to the butter mixture in three parts, alternating with the flour mixture in two parts. Between additions, mix thoroughly and scrape down the sides of the bowl.
7. Pour the batter into the prepared pans, filling approximately halfway. Bake 18 to 20 minutes, until the tops are starting to color.
8. Let the cupcakes rest a couple of minutes in the pans, then turn them out onto a cooling rack and allow them to cool completely before icing.
9. Make the Lime Curd and spread it on your cupcakes. Top with more coconut!
LIME CURD
1 teaspoon water
1/2 teaspoon unflavored gelatin
4 egg yolks
1/2 cup sugar
Juice of 3 limes
Green food coloring
Zest of 1 lime
2 oz. (1/2 stick) unsalted butter, softened and cut into pieces
1. Put the water in a small mixing bowl and sprinkle the gelatin over it to soften.
2. In a heavy saucepan, whisk the egg yolks and sugar to blend thoroughly. Whisk in the lime juice.
3. Place the saucepan on medium heat. Stirring constantly (but not vigorously) with a wooden spoon, cook the mixture until it begins to steam and thickens. When you can draw your finger across the curd on the back of the stirring spoon and the line stays without dripping, take it off the heat.
4. Strain the curd into the mixing bowl with the gelatin, and whisk to incorporate.
5. Add one or two drops of green food coloring until you reach the desired pale green.
6. Add the zest and butter, and whisk until the butter is melted and everything is an even color.
7. Refrigerate 30 minutes, or until the lime curd has thickened for a spreadable consistency.
I only have one more thing to add: Whoa, Baby!
You're Going To Go Crazy For Crazy About Cupcakes!
 I have been waiting for this book >>Crazy About Cupcakes<< to be released forever....I've had it ordered on Amazon since last February. A couple of weeks ago I decided to email Krystina Castella, the author, and ask her what inspired her to write a book about cupcakes. I found out that her book is much more than just recipes...it's templates and color palattes and themes that focus on flavor combinations and design elements...and over 300 creative cupcake ideas and it includes not only cupcake recipes and frosting recipes, but topping recipes and filling recipes, as well! Her favorite cupcakes are "anything chocolate or coffee flavored. The Office party...Coffee Break...cupcakes are all based on flavors of favorite coffee drinks. I also like stacking cupcakes with flavor combinations--my wedding cupcakes and petifour cupcakes are based on tiered cakes, and in a few of them I use stacking different flavors to combine flavors," she said.
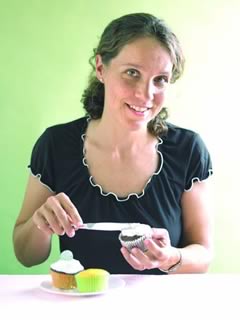 It quickly became clear to me why she wrote this book: She loves cupcakes! And, she's tested thousands of cupcake recipes, sometimes doing one recipe over and over, just changing one ingredient to see how it would affect the cupcake. You should hear her talk about them...she made me smile. It was like a was speaking to a cupcake soulmate. But, she doesn't only make cupcakes. Krystina is an industrial designer who got into cupcakes after selling her business manufacturing furniture, clothing, toys, and housewares a few years ago. She's a professor at the Art Center College of Design and used her students as guinea pigs for all of her cupcake recipes...and, she said they were often very harsh critics. She told me she got her love for baking from her grandmother, who taught her cool techniques and how to make things look good!
Here's what Krystina said when I asked her what the emphasis was, decorating, recipes, or a combination of the two: "To me, there are three parts to the cupcake--the cake, the icing, and the decorations--all work together to make a good cupcake experience. For example, Thanksgiving has pecans and maple and cranberry cupcakes, and Christmas has eggnog, gingerbread cupcakes. Even the everyday section cupcakes which aren't intended for an occasion have breakfast cupcakes with breakfast flavors, or healthy cupcakes with healthy ingredients and flavors."
Her recipes can be made "by the book," but Krystina encourages everyone to experiment and explore...get inspired by her recipes and decorations and then try something of your own making. The part I can't wait for is the chapter on Baking and Decorating Techniques which includes charts that give you ideas for different flavor combinations.
Here are some of the "Everyday Cupcakes" types in the book: Breakfast Cupcakes, Hidden Surprises Cupcakes, Healthy Cupcakes, Cookie and Candy Cupcakes, Totally Chocolate Cupcakes and Ice Cream Cupcakes. In the process of baking her cupcakes, Krystina said that learned that there "are people out there that enjoy cupcakes as much as I do. I have also learned that if something feels right when you are doing it...like me creating cupcakes for fun...to trust the process and keep at it--it will eventually lead you to a fulfilling place." Then she added, "My business card has four words. discovery, strategy, fun, fulfillment. It is how I approach everything in my life.
I think we're all going to be crazy about this cupcake book!
For a Goodtime...Call These Stuffed Cupcakes!
 Yes! These Chocolate Sour Cream Cupcakes with Mini Chocolate Chips are actually STUFFED to the gills with either Vanilla (on the top) or Mint (on the bottom) Buttercream Frosting! They are some of the most decadent cupcakes I have made yet...they just look and taste so....phat! The vanilla ones...they are so creamy and gooey that you have to use the back of your hand to get all the frosting off your lips! And, the mint ones are heavenly...by far the most favorite in our crowd of tasters today...I say that because there aren't any more mint ones left to taste. So, don't drop by today for one of the mint ones...I'm not kidding, there just aren't anymore mint...
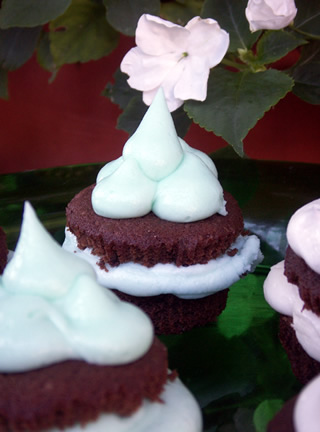 Two or three tasters tried them out early on today and then John, one of the kids, dropped by this afternoon right on cupcake cue, and picked up two mint cupcakes, one for someone he likes...Hi, Kate...and one for her friend...so cute! Then, Catherine, one of the other kids, took two home to share with her dinner date tonight...Hi Robe...and we haven't even heard from James and Amanda yet...n e waz...as I was trying to talk about my frosting and how I usually make my mint frosting pink, but this time I daringly tried green because I thought it would be cool...I have to admit that I did fool around with purple food coloring, too, but that frosting looked just plan nasty, not at all like summer...in fact, it sucked, what was I thinking?
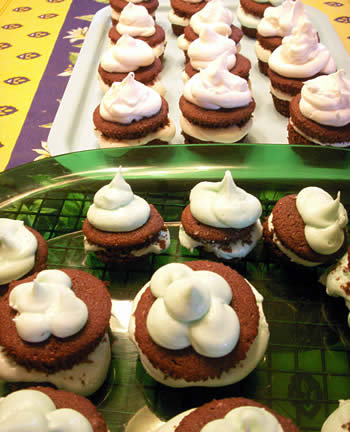 These cupcakes are so fat that by the time you're done with them that you will need and knife and fork to eat them. I did make some mini ones, too, that were just bite-sized and about right for one huge mouth full! I used the Chocolate Sour Cream recipe below, and at the end, I folded in...I can't believe that I just typed that...folded in, I mean...a year ago I didn't even know what that meant :)... 3/4 cup of mini chocolate chips to the batter just before pouring the batter into the cupcake liners. Then, after the cupcakes cooled off, I gently sliced off the tops...btw...while they were baking, as I said, I made the buttercream frosting....both vanilla and green mint...it's really a hard recipe to mess up. Then, I got out my trusty Williams Sonoma decorating thinggie that my sister gave me for Christmas (my favorite holiday)...you just put the frosting in it and push the plunger...the tube is metal...and you can put on any decorating tip you want...I always seem to use the biggiest round one I can find...I think it's #12.
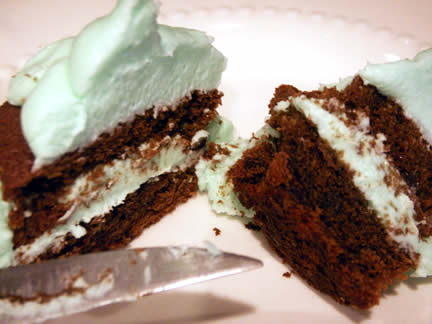 Here's a shot of one cupcake cut open. As you can see, I just cut the cupcakes in half horizontally and piled on the frosting for the middle section. Then I put the cupcake's lid back on and schulged a lot of frosting on the top, too.
  Well, why not? What else was I going to do with the frosting. I'm thinking of investing in confectioner's sugar...today I bought a 7 lb bag at Sam's Club! WOW! I've never bought a bag that big...where will it all lead? And, now you know who one of the morning tasters was....me! If you haven't ever tried a mint chocolate cupcake for breakfast, you don't know what you're missing...it was pretty damn fine! I know you can make it...just go do it!
Here's the recipe:
Chocolate Sour Cream Cupcakes
Yield:12 servings
3 ounces unsweetened chocolate, chopped
1 cup unbleached all-purpose flour
1/2 teaspoon baking powder
1/2 teaspoon baking soda
1/4 teaspoon salt
1/2 cup (1 stick) unsalted butter, room temperature
1 1/4 cups sugar
2 large eggs
1 teaspoon vanilla extract
1/2 cup sour cream
1/2 cup water
1. Place oven rack in middle position. Preheat oven to 350 degrees. Line 12 cupcake cups with paper liners. Place chocolate in heatproof bowl or top of double boiler and place over (but not touching) saucepan of barely simmering water (or bottom of double boiler). Stir until melted and smooth. Remove from water and set aside to cool slightly.
2. Sift flour, baking powder, baking soda and salt; set aside.
3.In large bowl, using electric mixer on medium speed, beat butter and sugar until smoothly blended and creamy, about 2 minutes. Stop mixer and scrape sides with rubber spatula. On slow speed, mix in melted chocolate. On medium speed, add eggs 1 at a time, mixing until each is blended into batter. Add vanilla and beat until mixture is creamy, about 1 minute. Mix in sour cream until no white streaks remain. On low speed, add half of flour mixture, mixing just to incorporate it. Mix in water. Mix in remaining flour mixture until it is incorporated and batter looks smooth.
4.Fill each paper-lined cup with about 1/3 cup batter, to just below top of liner. Make just until tops feel firm and toothpick inserted in center comes out clean, about 20 minutes. Cool cupcakes 10 minutes in pan on wire rack.
5.Use small knife to loosen any tops that might have stuck to tops of pan. Carefully place wire rack on top of cupcakes in pan. Protecting hands with potholders and holding pan and rack together, invert them to release cupcakes onto wire rack. Turn cupcakes top side up to cool completely.
Source: Adapted from “Cupcakes!” by Elinor Klivans (Chronicle, $16.95)
Billy's Vanilla Buttercream Frosting
Makes enough for 30 cupcakes
1 cup (2 sticks) unsalted butter, room temperature
6 to 8 cups confectioners' sugar
1/2 cup milk
1 teaspoon pure vanilla extract
1. In the bowl of an electric mixer fitted with the paddle attachment, cream butter until smooth and creamy, 2 to 3 minutes. With mixer on low speed, add 6 cups sugar, milk, and vanilla; mix until light and fluffy. If necessary, gradually add remaining 2 cups sugar to reach desired consistency. You can save this frosting for up to 2 weeks in the fridge.
2. At this point you can separate out a portion of the frosting to make some mint or whatever flavor appeals to you!
Hope you enjoy getting stuffed!
~CQ
Chocolate Cupcakes with Vosges Exotic Red Fire Chocolate Chips and Whimsical Bake House Buttercream Frosting
 This weekend's whimsical cupcake experience all began with a book (of course) I bought called The Whimsical Bake House, by Kaye Hansen and Liv Henson. OMG...it's such a cool book with fun, creative ideas. The recipe for the "House Buttercream" is in this book...that's one part, and then there's this section on "Working with Chocolate," which I got fascinated with. The next day I went to AC Moore and got some wafer chocolates and tried my hand at the little designs you see here. There are templates for "chocolate work" with each recipe in the book.
  This book is very encouraging and it's so easy to get started. I put my melted chocolate in a plastic squeeze bottle, used the template to make some stars, and eventually just started drawing squiggles! It was very fun...and funny because it seemed hard to make the simplest star! I made basic chocolate cupcakes and inserted one Vosges Exotic Red Fire Chocolate Chips wafer in the mddle of the batter after I poured it into the cupcake cups.
 The "House Buttercream" frosting was interesting. I love it! It's the first time that I have used Crisco in a frosting...and butter, too. It was actually very easy to make and it went worked so well on the cupcakes. It was easy to make swirls or whatever. I will definitely make it again! It's a perfect complement to the chocolate chili flavor of the cupcakes!
Enjoy!
Birthday Coming Up? It's Cupcake Shopping Time, Again!
 I know you know how I love cupcakes...and shopping...that's understood between us, right? Well, when I got home tonight, I switched on the tv to watch the news (btw, I'm also a news junky) and Comcast was down and out...grrrr....that actually rarely happens...but what's cool is that it gave me time to do some serious surfing for cupcake junk...I didn't just say that, did I?? I meant stuff, a lot of stuff, in fact, I found more than 60 pages of cupcake items on froogle...some were repeats yes, but WOW...what a lot of stuff...read that junk...However, I was able to pick out a few things that peaked my cupcake imagination (see skull cupcakes below)....So, let's have a go at these lovely cupcake items! I put my favorites first and last....And, oh yeah...the quoted descriptions of each item are from the seller's web site. I know you know how I love cupcakes...and shopping...that's understood between us, right? Well, when I got home tonight, I switched on the tv to watch the news (btw, I'm also a news junky) and Comcast was down and out...grrrr....that actually rarely happens...but what's cool is that it gave me time to do some serious surfing for cupcake junk...I didn't just say that, did I?? I meant stuff, a lot of stuff, in fact, I found more than 60 pages of cupcake items on froogle...some were repeats yes, but WOW...what a lot of stuff...read that junk...However, I was able to pick out a few things that peaked my cupcake imagination (see skull cupcakes below)....So, let's have a go at these lovely cupcake items! I put my favorites first and last....And, oh yeah...the quoted descriptions of each item are from the seller's web site. | |
 | Juicy Couture Cupcake logo V-neck T-shirt (White) "V-neck T-shirt Top With Black 'JUICY CUPCAKE' Logo Embroidered" Cost: $29.99 |
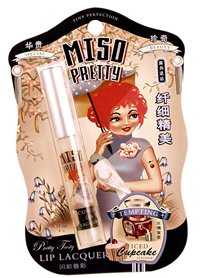 | "Miso Pretty Iced Cupcake Lip Gloss "from Blue Q delivers speedy shine fast with sparkling Cupcake flavour" Cost: $11.95 |
 | Cupcake Wonder Wallet "The Wonder Wallet will help you get organized! Zippered section for money and change, two sections for checkbooks, receipts, etc., and 6 clear pockets for cards. Snaps shut with a contrasting tab. All wallets are made of high quality, non-leather, waterproof vinyl. All Queen Bee items are made by hand in our Portland, Oregon studio. Dark Brown Wallet with pink frosting, red cherry, white stitching and cream snap tab." Cost: $32.00 |
 | Cupcake Layered Stickers "Rainbow collection. Each sticker is approximately 1.5 x 2" Cost $2.53 |
 | Cupcake Holder/Trivet Cost: $34.99 |
 | Cupcake Sandwich Bag "Cupcake Sandwich Size - Heavy duty designer zip-seal bags. 20 Heavy Gauge Designer storage bags in a box. Not recommended for use in microwave or for storage of liquids. Great for beach days, camp days, anyday...it all looks better in MOBI. Wonderful bag for party treats!! " Price: $4.99 |
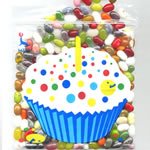
 | Cupcake Gift Bag "Our die cut cupcake bag is perfect for kids' parties or anyone with an insatiable sweet tooth. C'mon, stop fooling yourself --we know you can't eat just one! Stock this baby for a day of cupcake arts and crafts; include edible colored candies, foil muffin cups, a mini-muffin pan and mom's recipe. You'll make someone's day just a little bit sweeter. Small: 6" long by 7" wide by 3.38" deep." Cost: $5.00 |
 | 18" Cupcake Piñata Cost: 15.99 |
 | Cupcake Goody Bags "These adorable felt goody bags are perfect for baby's first birthday party. Fill them with sweet treats and mementoes of the occasion. Kids will love using the bag for treasures long after the party's over." Cost: $4.95, 5/$21.95, 10/$39.95 |
 | Smart Snacks® Sorting Shapes Cupcakes"Great for developing fine motor skills and shape recognition, these six colorful 2-part cupcakes pull apart to reveal a hidden shape that fits tightly into the matching pan. Shapes include square, triangle, clover, half-moon and circle. Cupcakes measure 2.5" x 2.25"". Cost: $14.95 |
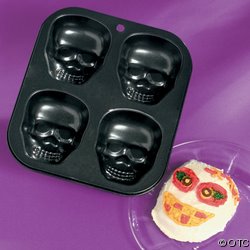 | Skull Cupcake Pan "7 1/2" x 8 1/4" x 1 1/2" Metal Skull-Shaped Cupcake Pan. Makes 4 cupcakes. Non-stick. Dishwasher safe. Accessories not included." Cost: $5.95 I've just got to order this skull thing! Now, get out there and shop! |


